How to connect a socket for an electric stove, hob or oven
Most often, the socket for an electric stove is structurally different from standard devices, since it is designed to connect devices of maximum power. In such cases, a separate line is required for connection, which leads directly to the main panel. If it was not carried out even when the electrical wiring was being installed, then you need to be ready for additional work.
Content
Distinctive features
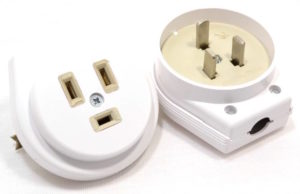 Regardless of whether the socket will be installed for the hob or oven, it is the power outlet that must be installed for them. There are quite a few varieties of them - each manufacturer can make a design at his discretion, while observing the requirements of GOST or PUE. Its main difference from household equipment is its ability to work with high-power currents, which is reflected in the thickness of the conductive contacts.
The overwhelming majority of electric stoves, hobs and ovens have external metal parts that, under unfavorable circumstances, can be energized. To protect a person and equipment from electric shock, in such cases, grounding is used, the contacts of which in ordinary sockets look like pressure tendrils. The oven socket cannot be equipped with such protection, since it is insufficient for high amperage currents. As a result, the socket grounding contact is carried out on the plug itself with a separate pin. Some people confuse a three-prong plug with a three-phase plug, but in fact it is phase, zero and ground.
Wiring requirements
If the wiring on which the socket for the oven will be installed does not meet the following requirements, then it must be changed, moreover, it is advisable to clarify this issue even before purchasing the device:
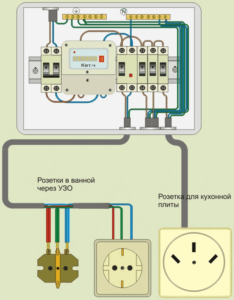 Separate line. Standard wire and socket are rated for 16 amps. The voltage in the network is always 220 Volts, so you can calculate the maximum power of the outlet for the electric stove, which you can connect through it. Power is equal to the product of current strength and voltage - 16 multiplied by 220, it turns out 3520 watts or 3.52 kW. This means that if the socket for the purchased hob and oven is connected to the common kitchen circuit, then these devices can only be used one by one, and turning off everything else - the microwave, kettle, etc. If you connect an oven to one outlet, and to another, on the same line, for example, a hob or another powerful enough device, then the wiring will heat up and will soon fail if it does not close immediately.
- Wire cross section. In closed wiring, a copper cable with a cross section of 2.5 mm² can withstand the connection of devices with a power of up to 4.6 kW. If the device is more powerful, then the wire must be selected according to the following table:
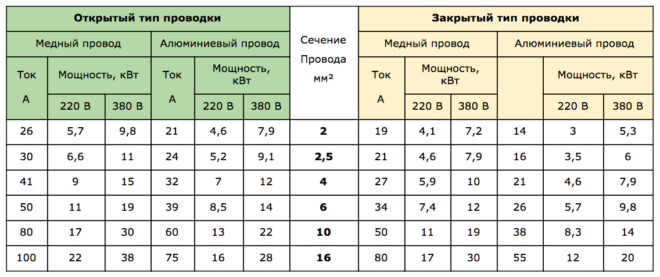
Based on this data, you can calculate not only the entire wire in the kitchen, but also what kind of socket is needed for the connected hob. It is clear that if the cross-section of the wire is selected end-to-end, then more than one device cannot be connected to one outlet, even a double one, therefore, in case such a need arises, the wiring in the kitchen should be selected with a margin.
Selecting a socket by the number of phases and grounding
Since the manufacturer does not know which socket will be used for a specific electric stove, most devices are sold without them.It's not even that the sockets are different - it's just that most devices can be connected both to a single-phase household network and to a three-phase source. Accordingly, only after determining the type of device that will be purchased, it is decided which outlet to choose.
A single-phase power outlet is larger than a conventional one and can supply a phase, working zero and ground to the device. If the apartment does not provide grounding, then one contact remains empty.
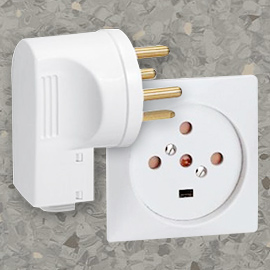 A three-phase socket for an electric oven or under the hob is power by definition - even the weakest of them is designed for a current of 32 Amperes. Depending on the presence or absence of grounding, it can have 4, 5 or 7 contacts. The latter option is rare, since this is a way to install additional protection and in the vast majority of cases is not used.
As a result, the main choice of a socket for electrical equipment comes down to determining the power for which it should be calculated, the number of phases from which it will work, and the presence of grounding.
Design Tips
When it is known what should be the outlet for the purchased stove in terms of power and the number of phases, then it is possible to evaluate the secondary characteristics that will affect the comfort of its use.
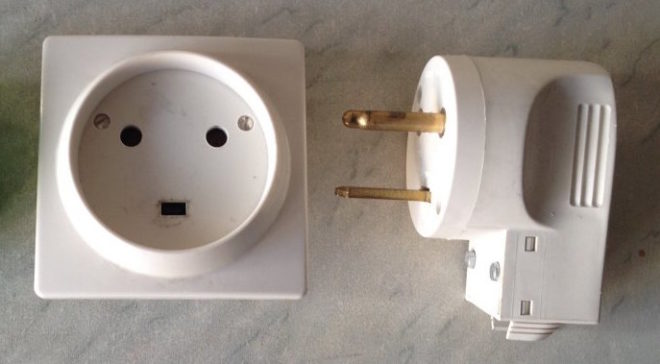
External or internal. The first option allows you to install a socket for an electric stove directly on the wall surface - in some cases, for this, a stand is first installed, but more often it is attached with ordinary dowels. In the second case, the installation of a power outlet for an electric stove is done inside the wall, for which you will have to cut a landing slot in it. This is more convenient because the plug of the hob will not protrude so much above the surface, and from a safety point of view, such a connection is more reliable.
The presence of a retainer. If it is, then this is very good, since an electric current, especially a high power, creates a vibration effect on the contacts. In most cases, the contact clamps cope with this, but there will never be superfluous reassurance with powerful devices. Fixation occurs due to a latch, which is raised by a button or threaded - by a union nut.
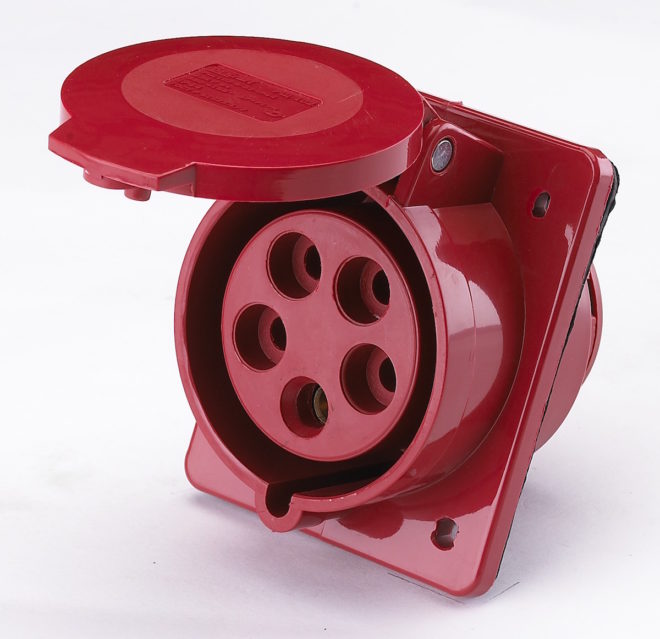
Safety shutters. Most often, sockets are not installed high, which is a potential hazard if there is a child in the house. The curtains in the power outlet for the oven are made in such a way that nothing but a plug can be inserted into them.
Degree of protection. In the documents and on the outlet itself, they are designated as IPXX. Instead of XX, a digital code is put, indicating the degree of protection of the contacts from foreign objects and moisture. The minimum value is IP00 and the maximum is IP68. Fully protected socket and plug for the electric cooker prevent water from entering the contacts, even if their housings are immersed in water. In the kitchen, it is allowed to use devices with a protection class not less than IP24 - this means that the housing protects the contacts from direct splashing water, no matter which side they come from.
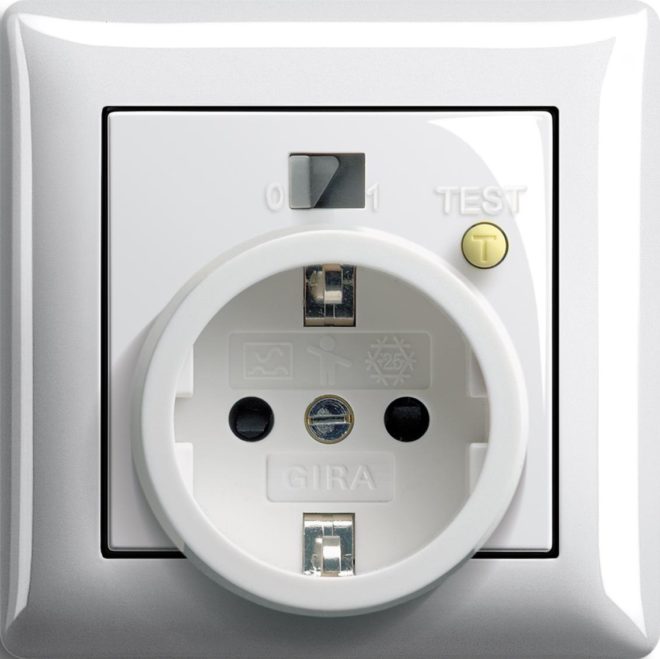
There are also models with built-in RCDs and other additional protection, but how justified is their use and whether it is worth overpaying for such "goodies" should be evaluated in each case separately, depending on the overall quality of the device.
For more information on choosing a socket for an electric stove, see this video:
Connecting the socket
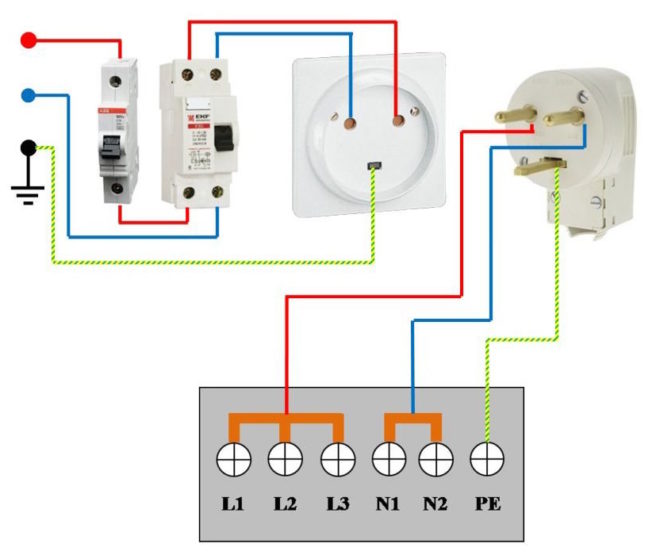
In general, connecting a power outlet for an electric stove in the sequence of operations is no different from installing a regular household one. The most important feature is the strictly defined connection of contacts.If for a household outlet there is no difference how to connect the phase and zero, then confusing the contacts in the power ones, under the hob or for the oven, is fraught with a short circuit or the appearance of a phase on the metal parts of the device, regardless of whether the device is one or three-phase. Power outlets are made in such a way that it is impossible to insert the plug into them incorrectly, but you must be careful when connecting.
Single phase sockets
It would seem that the only important thing in them is how to connect the ground wire - after all, the rest are normal phase and zero. In practice, the hob and oven are connected to certain contacts, since many models are designed to operate from one and three phases - you just need to remove or install a special jumper in the right place.
In order not to confuse what and where to connect, there are marks on the case on the inside of the outlet and often on its cover indicating which contact should be the phase, where is zero and ground. It remains only to carefully look so that each installed wire is in its place.
Three-phase sockets
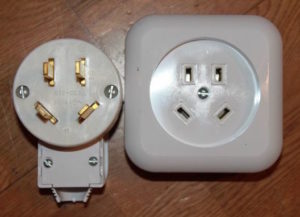 It is necessary to install and connect a three-phase outlet in the same way as a single-phase one, with the difference that there are some liberties with connecting the phases. If the neutral and ground wires must be installed strictly in their place, then the phases can be attached to the remaining contacts in any order - there is no difference.
Since the neutral and phase wires must be connected to a specific place, each contact is marked - the phases are marked with the alphanumeric designation L1, L2, L3, the neutral wire with the letter N, and grounding with three horizontal lines, each of which is shorter than the previous one.
A separate point concerns the cable that will power the outlet. Depending on the number of phases, devices of different power can be connected to wires of the same cross-section, and the difference can be 50-80%. In this case, it is still advisable to choose the wires of such a cross section as if the connection would be made in a single-phase way. The fact is that if, for example, take a three-burner electric stove, then each of them can be connected to its own phase. Accordingly, when one of them is turned on, then only one phase wire is in operation. Most often this does not matter, since the power of one burner is 1.5-2 kW, which can be handled by a thin wire of 0.5-1 mm², but once again find out which connection scheme does not interfere, or even better - just take the cross-section wires with a margin.
Connecting contacts to the stove
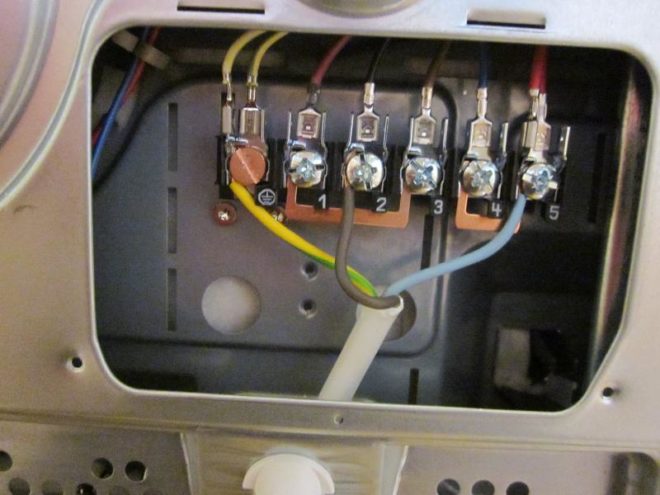
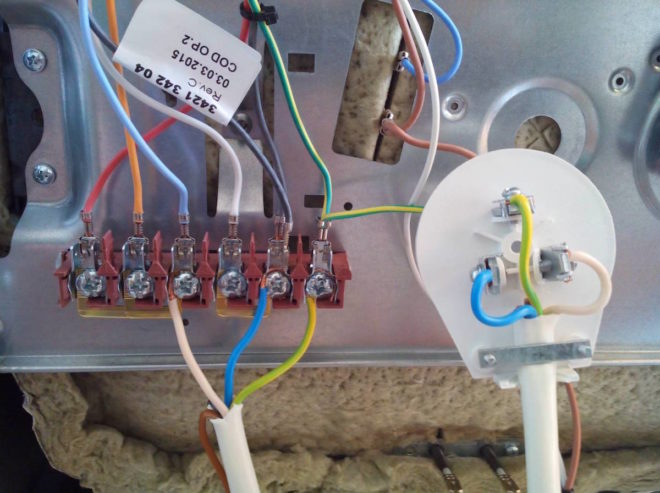
Most ovens and electric stoves have a typical wiring diagram, which shows whether the device can be connected to only one or also to three phases. If the device has a universal circuit, then it consists of 6 contacts, three of which are for connecting phases, two for zero and the last one for grounding. The markings are exactly the same as on the sockets - the phase contacts are L1, L2, L3, zero is indicated as N, and grounding with a standard icon.
If a three-phase connection is made, then all wires are simply connected to the corresponding contacts. In the case of a single-phase network, in the device kit, you need to look for jumpers - one of them closes the phase terminals with each other, and the second zero. Accordingly, the phase wire can now be connected to any of the first three terminals, zero to any of the next two, and ground to the last. If suddenly there is no jumper, then they need to be made independently, for which a piece of wire is suitable, the same one that was used to install the outlet.
Some devices do not have contacts, and instead of them, a wire is simply brought out, which must be connected to a plug. Regardless of the number of phases, the colors of the insulation of the grounding wire will be yellow-green, zero - blue, and phase - any others.
In any case, before connecting, you need to study the instructions - if the device is from a normal manufacturer, then there should be a diagram that is understandable even to a non-professional.
Very detailed instructions for connecting an electric stove are contained in this video:
and a short instruction can be found here:
A few words about safety
The above instructions are enough for a person who has at least the slightest knowledge of electrical engineering or who wants to figure out what to do and how to do it, can connect the electric stove. Otherwise, it is better to budget for the purchase of funds in order to invite a professional for this purpose, especially if you need to carry out grounding or groove grooves in the wall for the cable.
Despite the fact that installing a socket for a kitchen stove or oven can be compared with assembling a designer, it should be remembered that electricity never forgives mistakes and in handling itself requires not only respect, but also sufficient skills.

