How to weld wires with your own hands
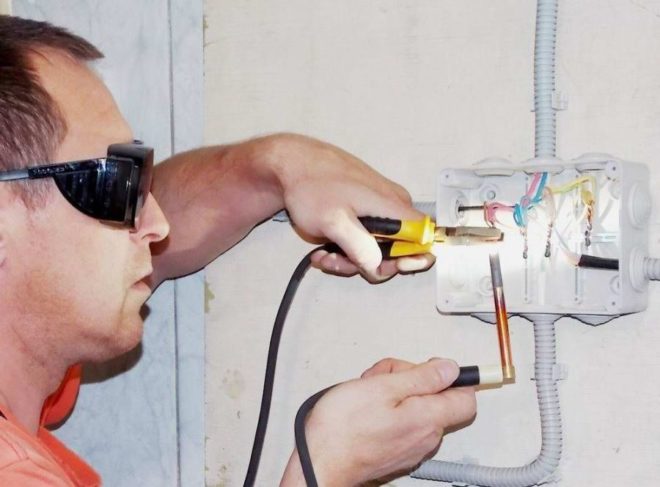
The provisions of the PUE recommend welding wires as one of the most reliable ways to connect them. The advantages of using this method far outweigh the few disadvantages that make it popular with DIYers and professional electricians.
Content
Pros and cons of welding, its varieties
The advantages of welding the wire connection are the absence of transition resistance, which is always present when twisting or bolting. This is especially true when laying wiring for powerful devices.
The disadvantages are the need to buy or make your own welding machine designed for twisting.
Welding work requires some skills, so an electrician who will weld twists needs to learn at least the basics of this craft.
During electrical work in production, various types of welding are used: standard, arc spot, plasma, torsion, electron-beam, ultrasonic, or various combinations thereof. For domestic use, most often electricians use a device for spot and arc welding, which works on carbon or graphite electrodes.
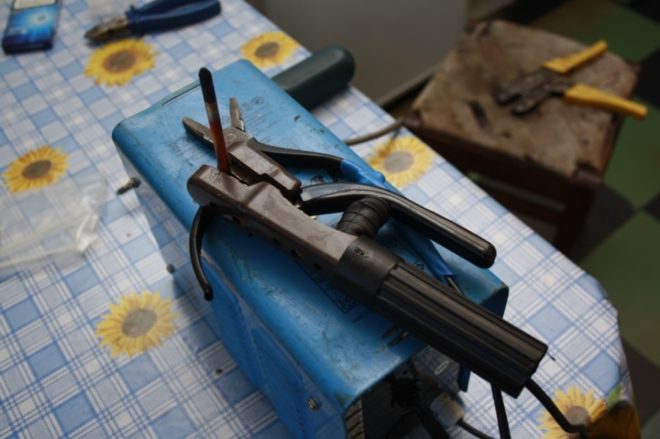
This solution allows you to get good quality connections at a minimum cost of the required devices and components.
When making an apparatus for welding wires, most of all attention should be paid to the following characteristics of the device:
- The current strength that the device can issue. Ideally, this is a variable value.
- The voltage provided by the device is sufficient to create an electric arc - usually 12-32 Volts.
- From what current the welder works - alternating or direct. If you have experience with such work, you can use a variable, but for beginners, it is strongly recommended to start with a constant.
Since different metals require different currents and voltages to weld, universal welding machines can necessarily adjust these values. In addition, when connecting different materials, you may need special fluxes that will protect the metal from oxidation or the penetration of gases from the air into it. For the most part, universal welding machines are quite bulky and heavy, but for small welding jobs, you can find inverter welders for a relatively low price, which are ideal for welding wires.
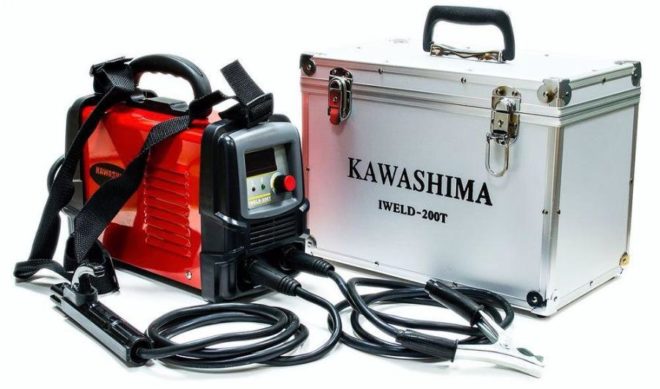
If copper wires are being welded, which are used in home wiring, there is no need to use a very high current and voltage, therefore it is possible to use small-sized welding machines that fit in a standard tool case.
The principle of operation of arc welding - device diagram
Since welding requires a large current, a step-down transformer is the basis of any welding machine - a loss in voltage is always accompanied by a gain in current strength and vice versa.
A standard diode bridge is used to convert AC to DC, and a capacitor is used to smooth out ripple.
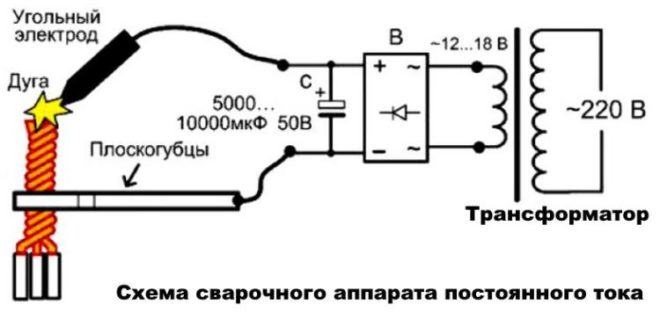
A tangible disadvantage of using a DC device is that diodes and a capacitor are used of rather large sizes and they significantly increase the weight of the welding machine, which is initially made portable.
Also, experts recommend to put additional resistance at the input or output of the diode bridge, since diodes "do not like" a short circuit in its pure form.
Many craftsmen manually assemble a welding machine for welding copper wires, which produces an arc from an alternating current and use them with success. Therefore, it is impossible to say unequivocally that it is impossible to use a direct current device - everyone chooses the necessary model for themselves according to their skills. If the AC welding machine is manually assembled, then the diode bridge and capacitor are simply thrown out of the circuit.
A necessary skill that will have to be mastered to use an AC welding machine is to learn "by eye" how long the ignited arc of an electric discharge should be held in order for the end of the twist to heat up and melt.
The most common way to make a negative contact, which is used for welding, is with old pliers that hold the wires.
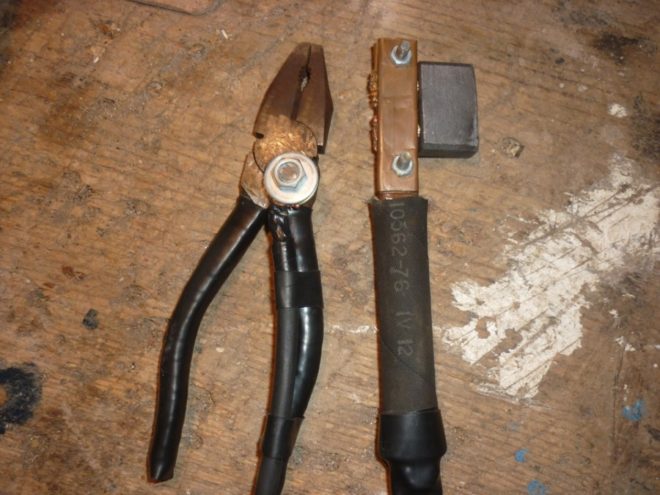
A clamp is taken for the phase, which can hold the graphite rod. The design of the clamp can be very diverse - from screw connections to so-called "crocodiles", both home-made and factory-made. For connection with the welding machine itself, cables with a cross section of about 10 mm² are used.
Despite the fact that a device assembled in an industrial environment is an order of magnitude more expensive than a home-made one, its price is not exorbitant and allows you to purchase such a welding machine even with a limited budget. The advantages of using it are obvious - it is a precisely calculated design with a current regulator, which allows you to work with different types of metals and the number of wires to be welded.
Nuances of the wire welding process
With the necessary skills, welding conductors does not take long, but to get a good connection it is highly recommended to first practice on individual pieces of cables. Moreover, this must be done if an apparatus for welding twists is used that works with alternating current - you need to get used to the power of such a device. The whole process is clearly shown in the following video:
Step by step, everything looks like this:
- Wire stripping. A special feature of welding is the need to strip the conductors of the wires to a length of 60-80 mm. Less is impossible, since during welding the wire heats up quite strongly and the insulation will melt.
- Twisting of wires. It would seem that you can simply fold the wires and weld - anyway, a drop forms at the end that will connect everything together. The problem of this method of connection may be the fragility of the wires - it is not a fact that it will arise, but for some reason, the drop resulting from welding with a carbon electrode acquires a spongy structure and is prone to fracture. This does not affect conductivity, but if the wires are not twisted, they can break.
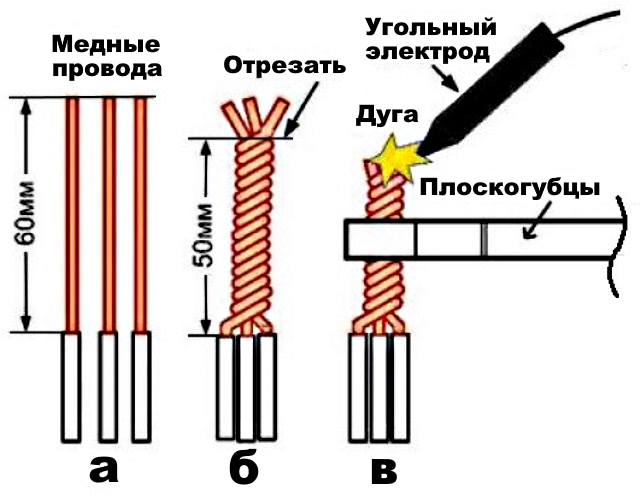
- Trimming the twist. The fluffed ends of the veins must be cut off in order to get an even cut. Then the arc during welding will evenly warm up the entire surface of the twist and the drop will turn out to be even.
- Welding. The twist is captured with pliers and a graphite electrode is brought to its tip until an electric arc occurs. It must be held until the ends of the wires are fused, forming a smooth drop. The next twist is welded after the previous one has cooled.
If the arc does not appear, then the power of the transformer is insufficient or too long wires to the electrode holders are used (their resistance prevents sufficient current from being obtained).
The best option for the length of the wires is 2.5-3.5 meters, but in the first case, for the convenience of work, the welding machine will have to be placed on a stand.
- Insulation of twists.The optimal option in terms of speed here would be the use of heat-shrinkable cambrics, but to warm them up, you will additionally need a construction hairdryer or a good lighter. Also, there is no hindrance to using ordinary electrical tape - unless it will be a little longer in time.
- Welding copper and aluminum wires. In general, it is performed in the same way as the usual one - the only difference is in the preparation of the wires. The copper strand remains straight and the aluminum strand is wrapped around it. Then a flux is applied to the aluminum, which, when heated, removes the oxide film from this metal, and you can start welding.
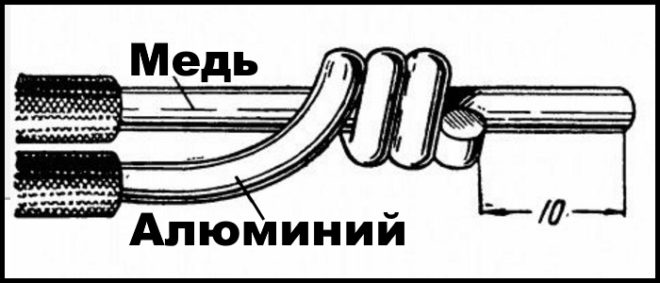
But if you follow the requirements of the PUE, then in domestic conditions you will hardly have to work with aluminum wires, since the use of such cables with a cross section of less than 16 mm² is prohibited for laying electrical wiring.
Inverter welding of wires
The use of such a device is most preferable, since it is much easier to weld copper and aluminum wires with an inverter than with homemade welding machines. This is a device of a universal plan, the current strength in which is regulated in the range of up to 160 Amperes. In addition to the fact that it can weld strands, it allows you to work with metal up to 5 mm thick - for home use this power is usually more than enough.
Usually, such a device is the prerogative of professionals who are constantly faced with welding work, but at the same time it can be safely recommended to beginners who are just mastering twist welding with their own hands. The function of "hot start", protection against sticking of the electrode and the ability to work even with voltage drops will allow a novice welder to quickly master the basics of this craft, and a professional is always pleased to work with a good tool.
If the device allows you to adjust the voltage and current, then "by eye" what values to set can be determined by the diameter of the wires and their number.
Briefly about the main
Welding the ends of the twisted wires significantly improves the conductivity of these contacts, and hence the characteristics of the network as a whole.
Welding machines that allow spot welding are commercially available, and are also structurally simple enough to make them yourself. But in the second case, more often simpler devices that produce alternating current are assembled - such devices require certain operating skills.
In practice, there is not much difference in using this or that device - if the master is experienced enough, the result will be good in any case.


